How to make a turbo Heat shield
By Danny/MAZMAN
Ok, here is a very good do it yourself heat shield that anyone could do, and the end result is fantastic, just as good as the real deal if not better,
as there is no welding on it, and wont cost you an arm and a leg.
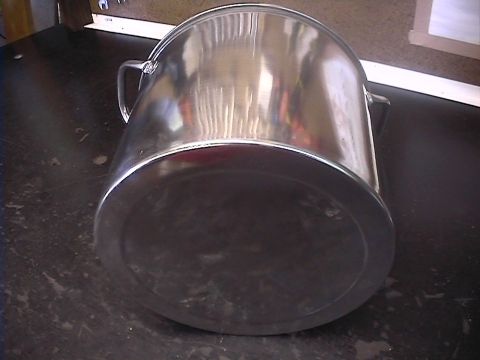
Go to the usuall shops like k/mart, big-w, target ect... where you will need to find a large bowl, made of stainless steal.
I used a stainless steal bowl of 0.3mm, already polished.
its thick enough to not flex/vibrate/bend, but thin enough to cut easy.
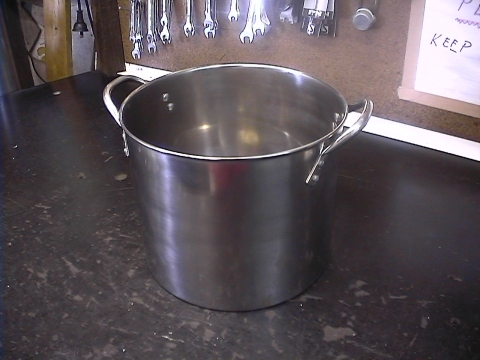
Look for the design you would like and the shape of it, its up to you to find a look that you will like, i bought a plain and simple design, with straight walls, no bends or funny shape design.
You can get aluminium ones, coppers ect... but i think stainless does a better job and ends up looking the best.
You will also need to measure your rear exhaust housing diameter, so as to not get a too small one or too large.
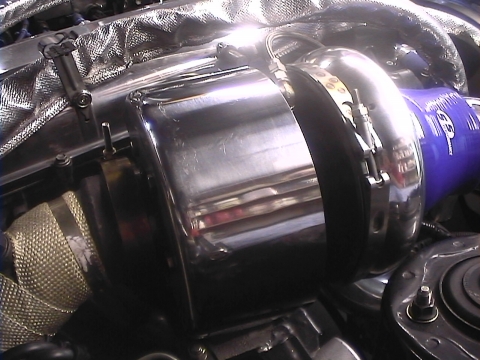
My turbo is 210mm o/d and the bowl i bought is 220mm, so i have a gap of 10mm between my housing and my shield.
------------------------------------------------------------------------------
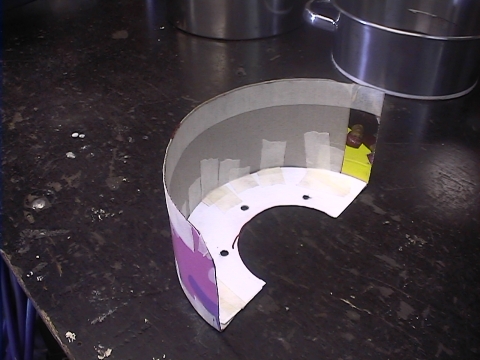
Once you have decided on your bowl, you will need to make a template.
I just used a thick cardboard to make my shape. Bend it to the shape you want, and sticky tape the other side on, so as to have the nice bendy/oval shape(see picture).
Put it on your housing and try to get the best possible bend and the look that you want.
Remember to get the width that you desire as well, and the lenght.
On my turbo (gt42) i had small threaded holes on the rear part of the housing, so i shaped the cardboard and made the holes that you see behind it.
This is where i will be bolting up the shield to the housing.
I understand that every turbo is different, but if you have these holes at the rear of the housing, you can measure them yourself and drill the holes to match your housing.
----------------------------------------------------------------------------
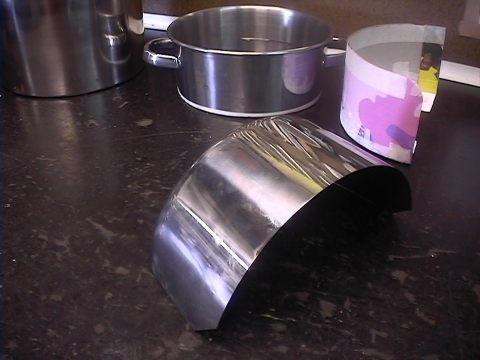
Now that you have a template to make your shield from, its time to cut the bowl to suit.
So measure up your template, put it against the bowl and make the required markings where you will cut it off.
You will be cutting of the head of the bowl(the top part where the handle is), and leaving the bottom part of it so you have something to bolt up to.
I used a cutting wheel on a grinder, taped up the bowl section with masking tape on the part i will use, so not to scratch/damage it, and cut my shape.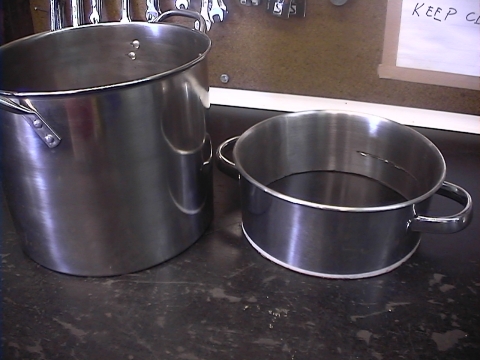
-----------------------------------------------------------------------------
Once cut,i used a fine file to get rid of the sharp ends, and then used a fine sanding wheel to get a smooth finish.
I cut the lip at the front of it just a bit, to make it look more professional.
Now all that you are left with is to put to template against the shield and mark the holes where you will drill, remember, put the template on the inner side of the shield when marking(not on the outer side), this will make sure you dont stuff up your measurements.
Once you have drilled the holes, again, sand down the sharp edges that the drill leaves (tip: drill from the outside of the shield as this leaves edges on the inner shield where you dont see it).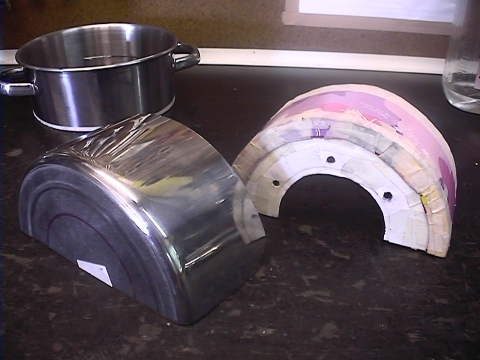
----------------------------------------------------------------------------
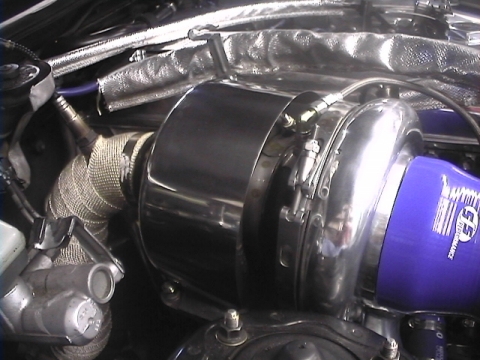
Now to find the correct bolt size and thread that will match your housing thread and bolt it on, and your done!!!
Then enjoy the mighty fine look it will give you as well as helping all that heat under your bonnet.
On the australian/RHD, our brake master and clutch master is very close, it helps greatly with this shield.
I couldnt be more happier with the end result.
I paid AU$26 for the bowl, and did the labour myself, so that cost me nothing, In the shops, they are asking AU$250 for this piece.
I have higher resolution pictures, but due to size, i needed to be fair to everyone and made them smaller.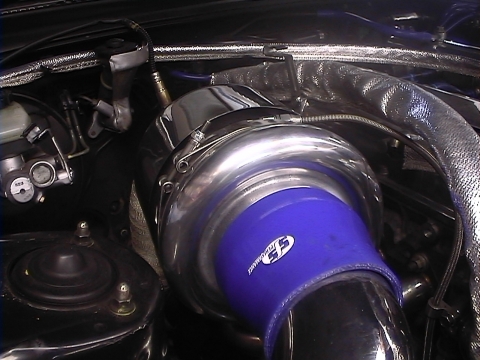
--------------------------------------------------------------------------------------
FINAL RESULT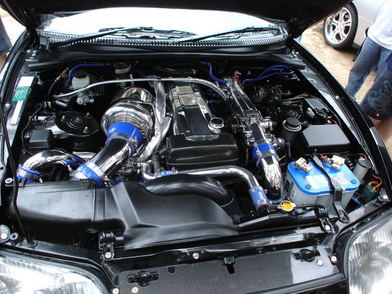

Hope ive gave someone an idea and a reason to make one, even if you do stuff it up, remember, you will still have another piece from the half of the bowl that is left over.
(you can make 2 pieces from one bowl).
Enjoy,
Danny
P.S. i dont know how long this post will last, due to my webspace limit, so if any1 wants to host it, they can, otherwise just see how long it will last till.