SHIFT BOOT INSTALL
- Thanks to TRD 2JZ
I finally installed my Redline shifter boot. Here's my first attempt at a write up, so be easy on me.
The instructions from Redlinegoods.com call for you to reuse one peg
& auto goop and to discard of the plastic ring, Dont do it!! I
opted to reuse the ring by cutting it in half at the two thin portions
& cutting 9 small metal pegs from a hanger. Also what ever you do, DONT USE AUTO GOOP! What a f'n mess & it don't work.
**Be very carful with the super glue. I dont want anyone ruining there shifter panel, esp. discontinued later model ones**
Use this link to remove your old shifter boot. http://www.redlinegoods.com/SupraMK4install.shtm
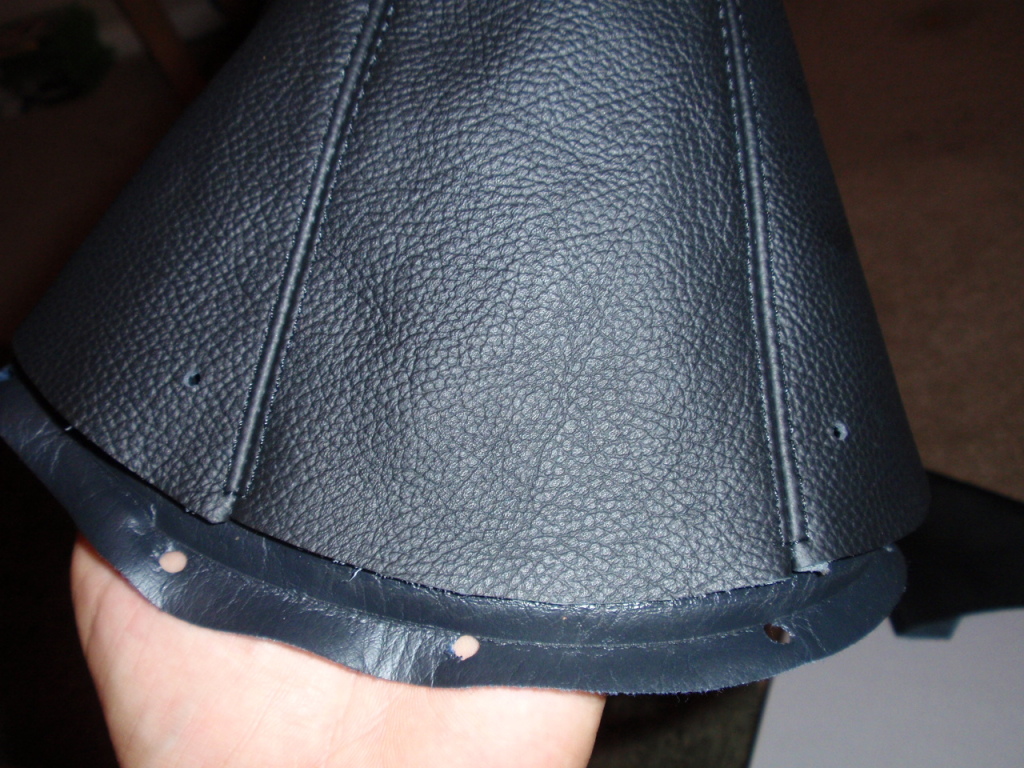
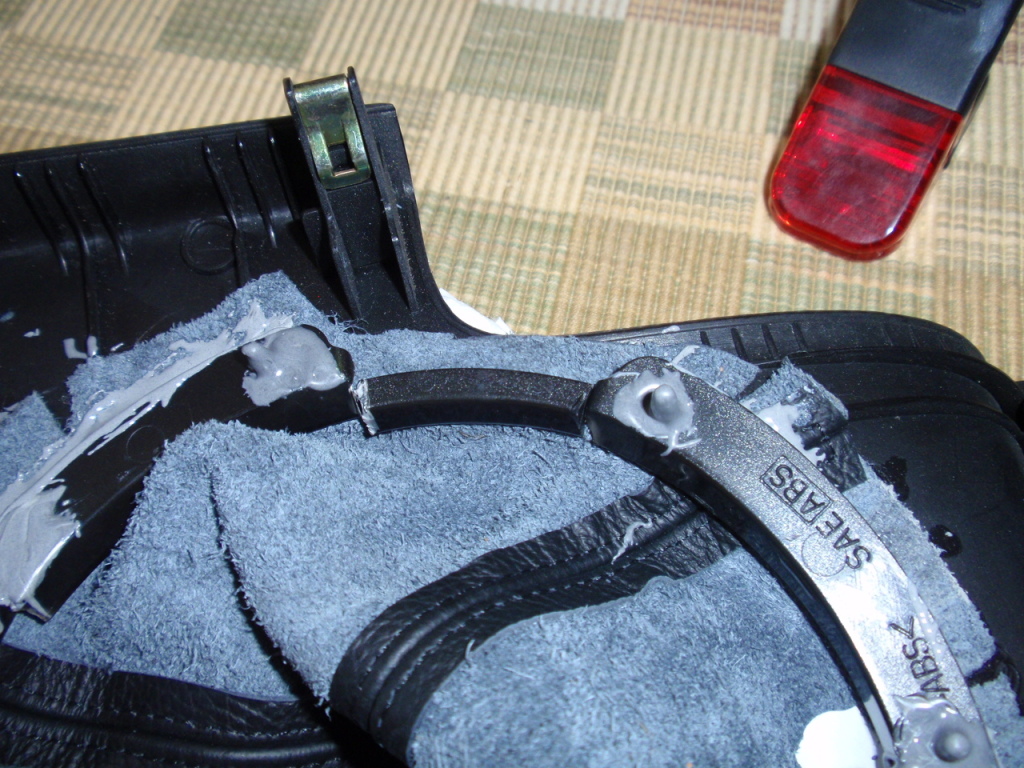
First I did a side by side comparision with both boots. The Redline boot was missing one hole, so I made the extra hole.
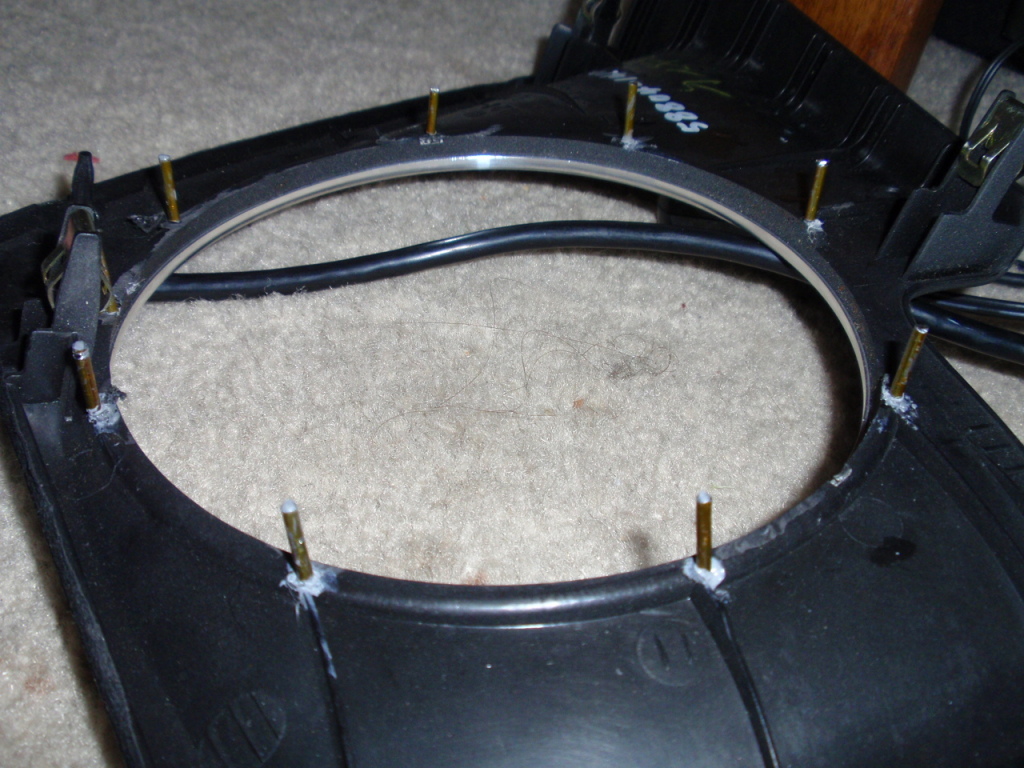
I then cut 9 small pieces from a metal hanger which would be used as
replacement pegs. Then I applied super glue to the metal pegs and
placed them onto the exact location of the previous plastic pegs. After
the super glue dried, I appiled JB weld onto the entire peg & peg
base (JB not shown) and waited 6 hrs. Be careful to not let any of the
JB weld drip down the shifter opening. If JB goes down the opening,
dont panic, if you catch it will easily wipe off.
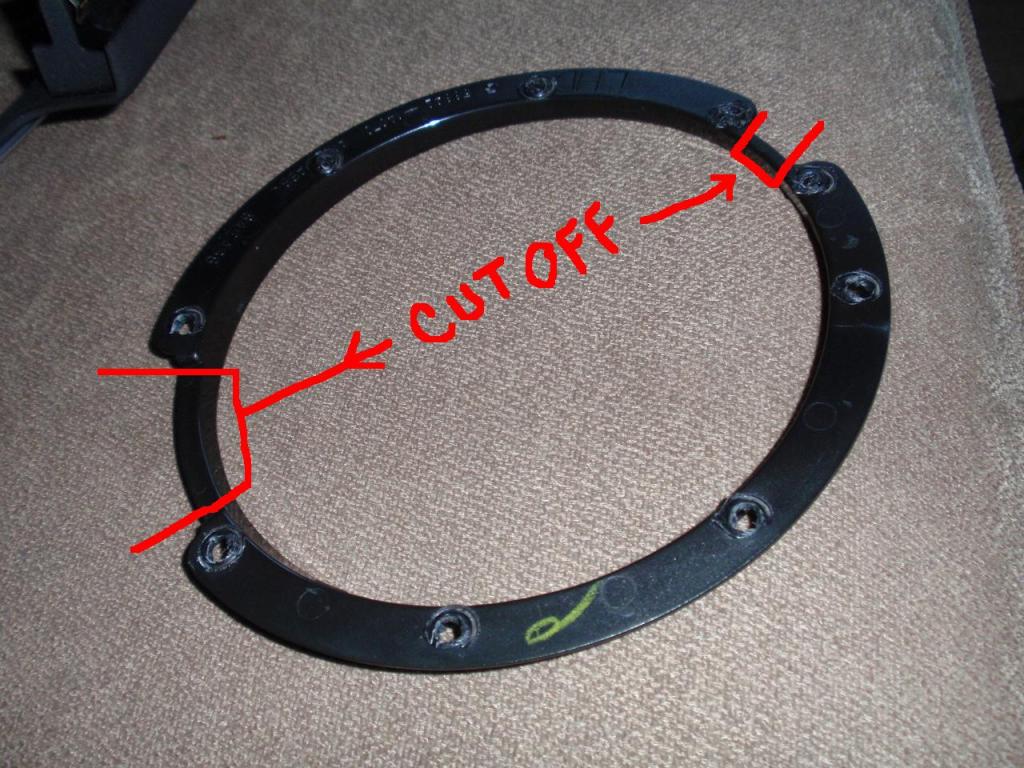
I cut off both pieces as shown below and discarded of the small piece
and saved the larger piece. I also enlarged the 9 holes with a 1/4
drill bit to allow a little more adjustment from L/R or U/D for the
metal pegs
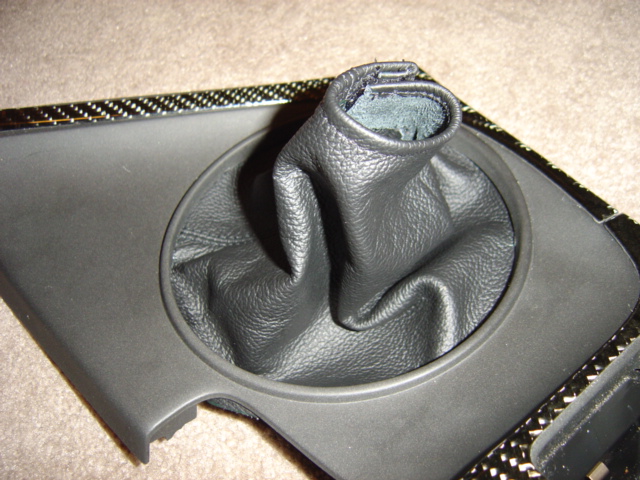
I cut small slices at the ends of the boot, 360 degrees, to allow the
boot to fold down. Due to the Redline boot being larger then the oem
boot, I also trimmed the outer portions of it. I then placed the boot
over the pegs then superglued the boot onto the panel. Be careful to
not use super glue near the shifter opening, because it could seep
through and it will be visable and ruin the boot. I placed the plastic
ring over the pegs and used clamps to hold the ring down. Its very
important to use the clamps to get a secure, tight fit. I then applied
JB weld on the metal pegs & holes. Also, w/out the ring under the
boot, the boot looks like ass.
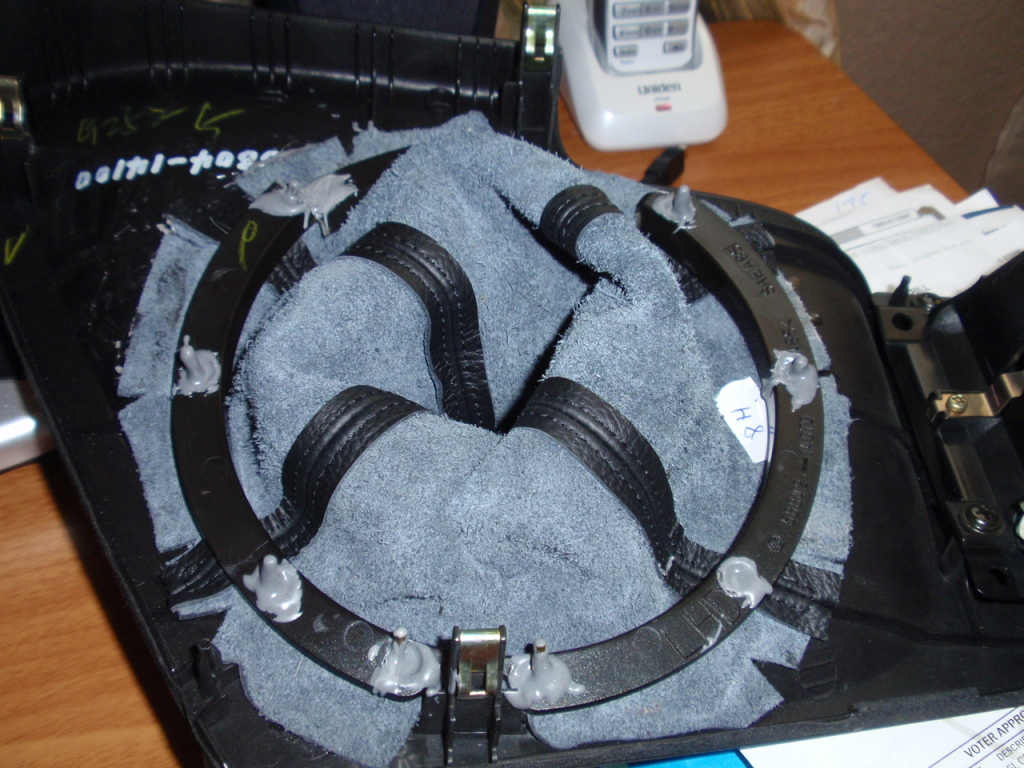
6 hrs later, I applied extra JB weld around the entire edge of the ring
for added security. I didn't want it falling apart on me. BTW JB weld
did not have any adverse affect on the plastic ring or leather boot.

The larger piece will be cut down to size and secured using JB weld and
clamps. I did this at the very end, just prior to install.
Heres Redline's install with no ring.
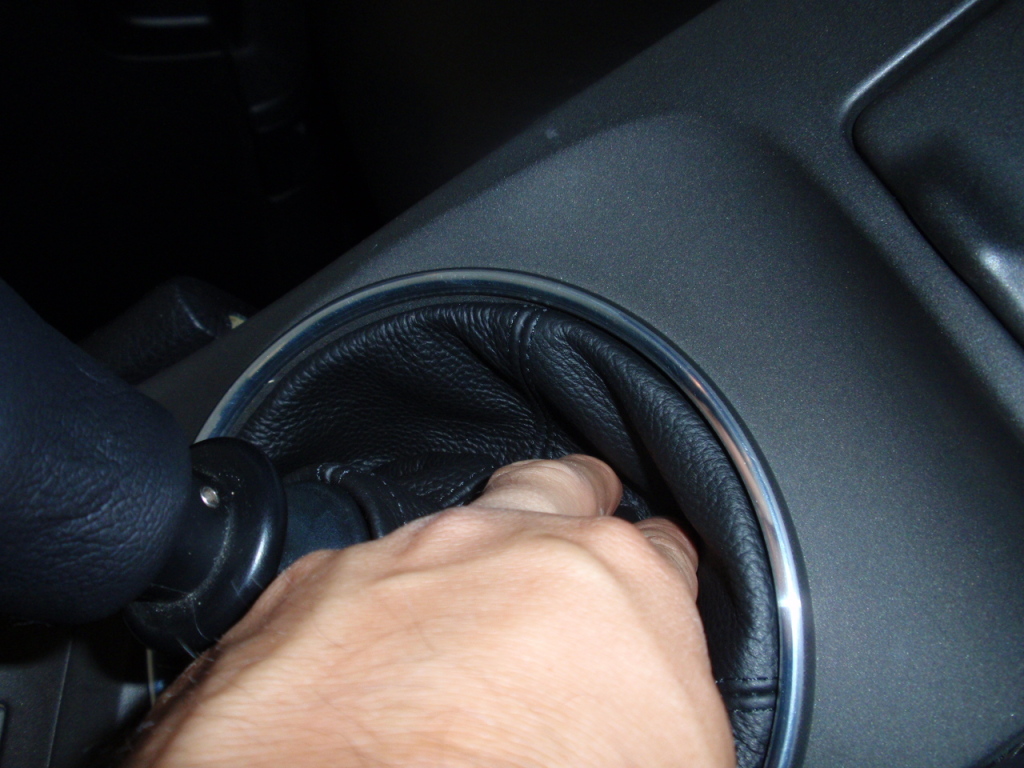
You can clearly see in this pic that when I push down on the boot, the
ring held the boot in place. This is because I reused the ring. My
first attempt was with out the ring and it looked like ass (sorry no
pics w/out the ring).
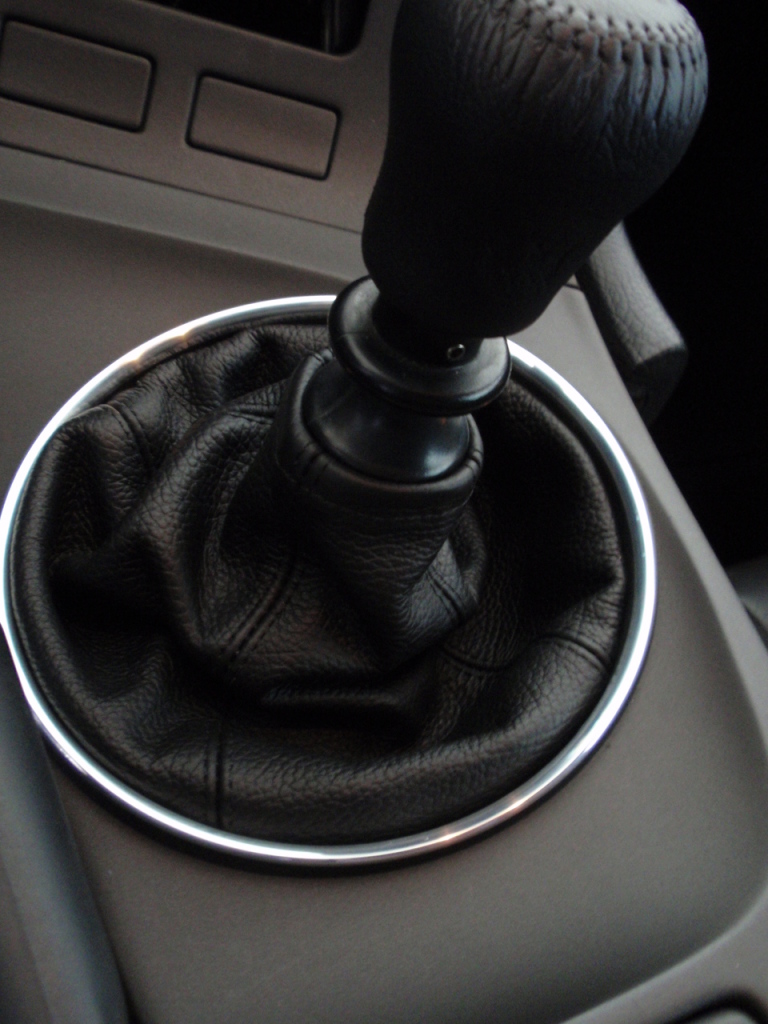
And heres mine...:love:
You can see the difference.
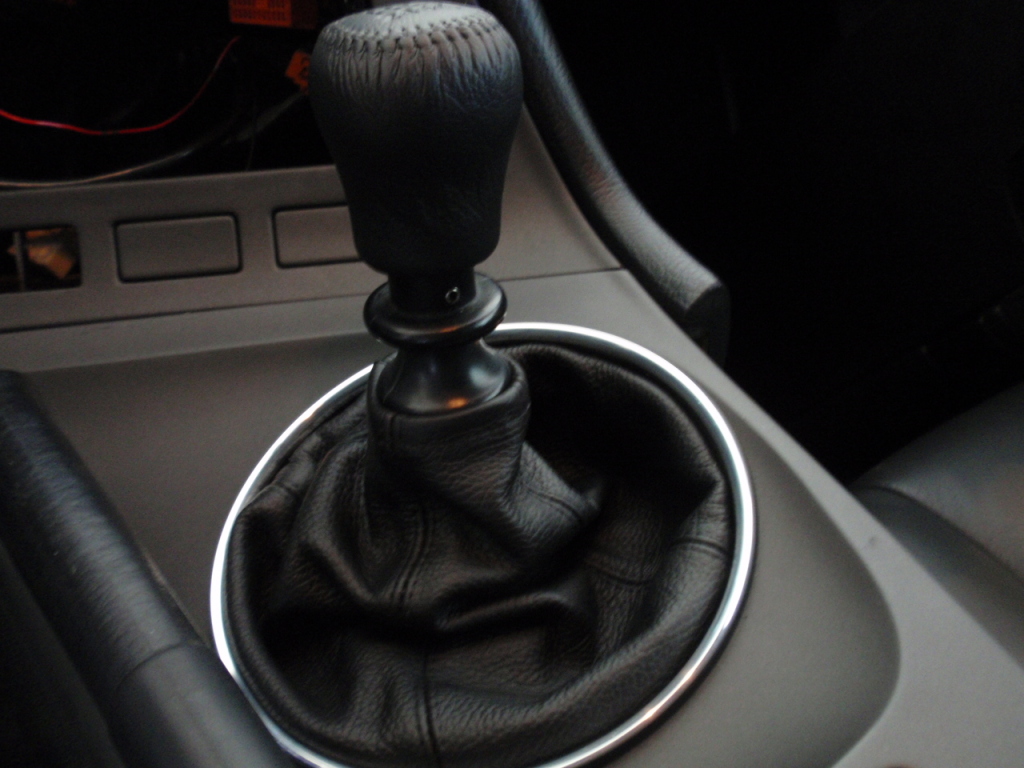
All I need now is the C's short shiter..
As the process evolves, I think members will make cleaner installs on
the underside on the panel and less barbaric looking then mine...