Full EGR Removal
This tech article deals with how to remove the whole EGR system and install both block off plates for TT model supra. In my first attempt I was able to remove the whole EGR system and install both block off plates in about an hour. This worked on my 93 6spd - I assume it will work on other years, but I haven't tried. Also note that I took the pictures after I was done - so the EGR is already removed in the pics. The egr recirculates exhaust gas backinto cylinder# 5 and #6.at open throttle.which isn't good when goingfor power.
On a n/a it distributes gases evenly between all cylinders but, ifremoved it doesn't really give u hp. just better throttle response, andyour not putting dirty ass air back into your engine.
THIS IS NOT GOOD IF YOUR THINKING TO PASS EMISSIONS. ALL MODS IS ATYOUR OWN RISK, I WILL NOT BE HELD LIABLE FOR YOUR MISTAKES. some peopleseem to pass emissions, and some don't, depending on where u go andwhat state your in.
If u need to put it back on for some odd reason, just do the tut backwards.
Step 1: Assemble the parts and tools
Parts needed to remove the EGR system:
- EGR block off plates (available from PHR, HPF, Mohd, etc)
- 10K Ohm 1/2 watt resistor (available at Radio Shack, etc)
- Electrical tape
- 2 Vacuum caps
Tools needed to remove the lower of the 2 bolts on the lower EGR pipe:
- 12mm deep well socket (preferably 6-point)
- 2 - 6" extensions
- 2 - 3" extensions
- universal joint
- ratchet
Tools needed to remove the upper of the 2 bolts on the lower EGR pipe:
- 12mm ratcheting box end wrench
Tools needed to remove the nuts and studs on the upper EGR pipe:
- 12mm ratcheting box end wrench
- 5mm socket and ratchet

Step 2: Assemble the ratchet and extensions
Assemble two separate pieces in this order:
Piece 1: 12mm deep socket + 6" extension + universal joint + 3" extension
Piece 2: 6" extension + 3" extension + ratchet

Step 3: Find the lower EGR bolts
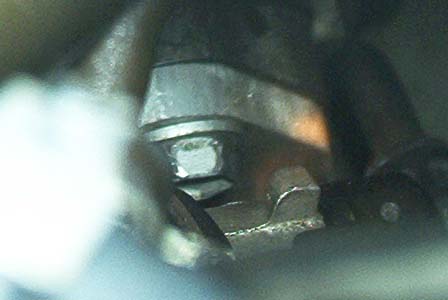
Reach your right arm next to the intake manifold behind the oil dip stick. Run your hand along the EGR pipe to where it meets the block.It may be a tight squeeze, but you should be able to reach the block and the two bolts that need to be removed. Familiarize yourself with the area by touch as it will make the next steps easier.

Step 4: Attach the socket section (piece 1) to the lower bolt
Reach your right arm the same as in step 3 except with piece 1 in your hand. Feel where the lower bolt is with your hand and then slide the socket onto the bolt. Once the socket is on the bolt, slide your other hand down to hold the universal joint and pull your right arm out.

Step 5: Attach the ratchet section (piece 2) to the socket section (piece 1)
Attach the ratchet with extensions to the exposed extension from step3. It is hard to turn a universal joint at a 90 degree angle, so try to lean the ratchet as far to the driver side as possible. From here just remove the lower bolt.

Step 6: Remove the upper bolt on the lower EGR pipe
The EGR pipe itself gets in the way of the upper bolt if attempted in the same way as the lower bolt. It is easier to reach the upper bolt from directly above. A regular 12mm box end wrench will work, but it will take a while. The ratcheting box end wrench makes life a lot easier and can be bought from Sears for less than $10. Make sure once both bolts are removed that you keep the gasket.
If you have trouble with the wrench and want to use the ratchet combo like with the lower bolt - you will need another universal joint.Assemble the piece 1 in this order: 12mm deep socket + universal joint+ 6" extension + universal joint + 3" extension.
Step 7: Remove the nuts on the upper EGR
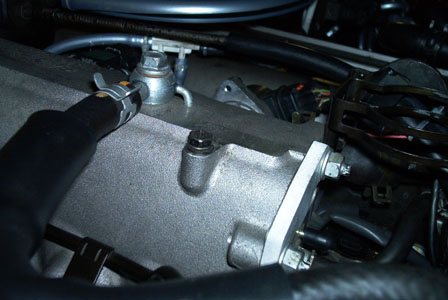
Remove the two nuts at the back of the intake manifold either with the 12mm box end wrench or with a 12mm socket and ratchet.
Next remove the studs with a 5mm socket and ratchet.
As with the lower one - make sure you keep the gasket.
Step 8: Remove the EGR system
Disconnect and unbolt the EGR actuator from the top of the intake manifold.
Disconnect the EGR temperature sensor.
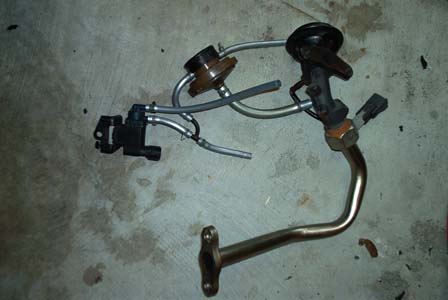
Remove the EGR system with pipe and all the hoses connecting to it.

Step 9: Install the lower block plate
Use the lower gasket you kept from step 6 and install the lower block off plate.
The two bolts can be installed the same way they were removed.

Step 10: Install the upper block plate
Use the upper gasket you kept from step 7 and install the upper block off plate. The two studs and nuts can be installed the same way they were removed (or you can use bolts instead of the studs and nuts).

Step 11: Finishing up
You should end up with two open vacuum ports, these need to be capped with the vacuum caps (optionally zip-tie the caps tightly in place).
Put the 10K Ohm resistor in the temp sensor socket and tape it in place.

- Thanks to 93MKIV